Learn how to partner with VPN Client. Follow the next easy steps to set up your internet freedom.
Step 1
Download free VPN Client from the Mac App Store and install it.
System requirements:
- Mac OS X 10.11 or later
- 64 bits processor
- 4GB RAM
Step 2
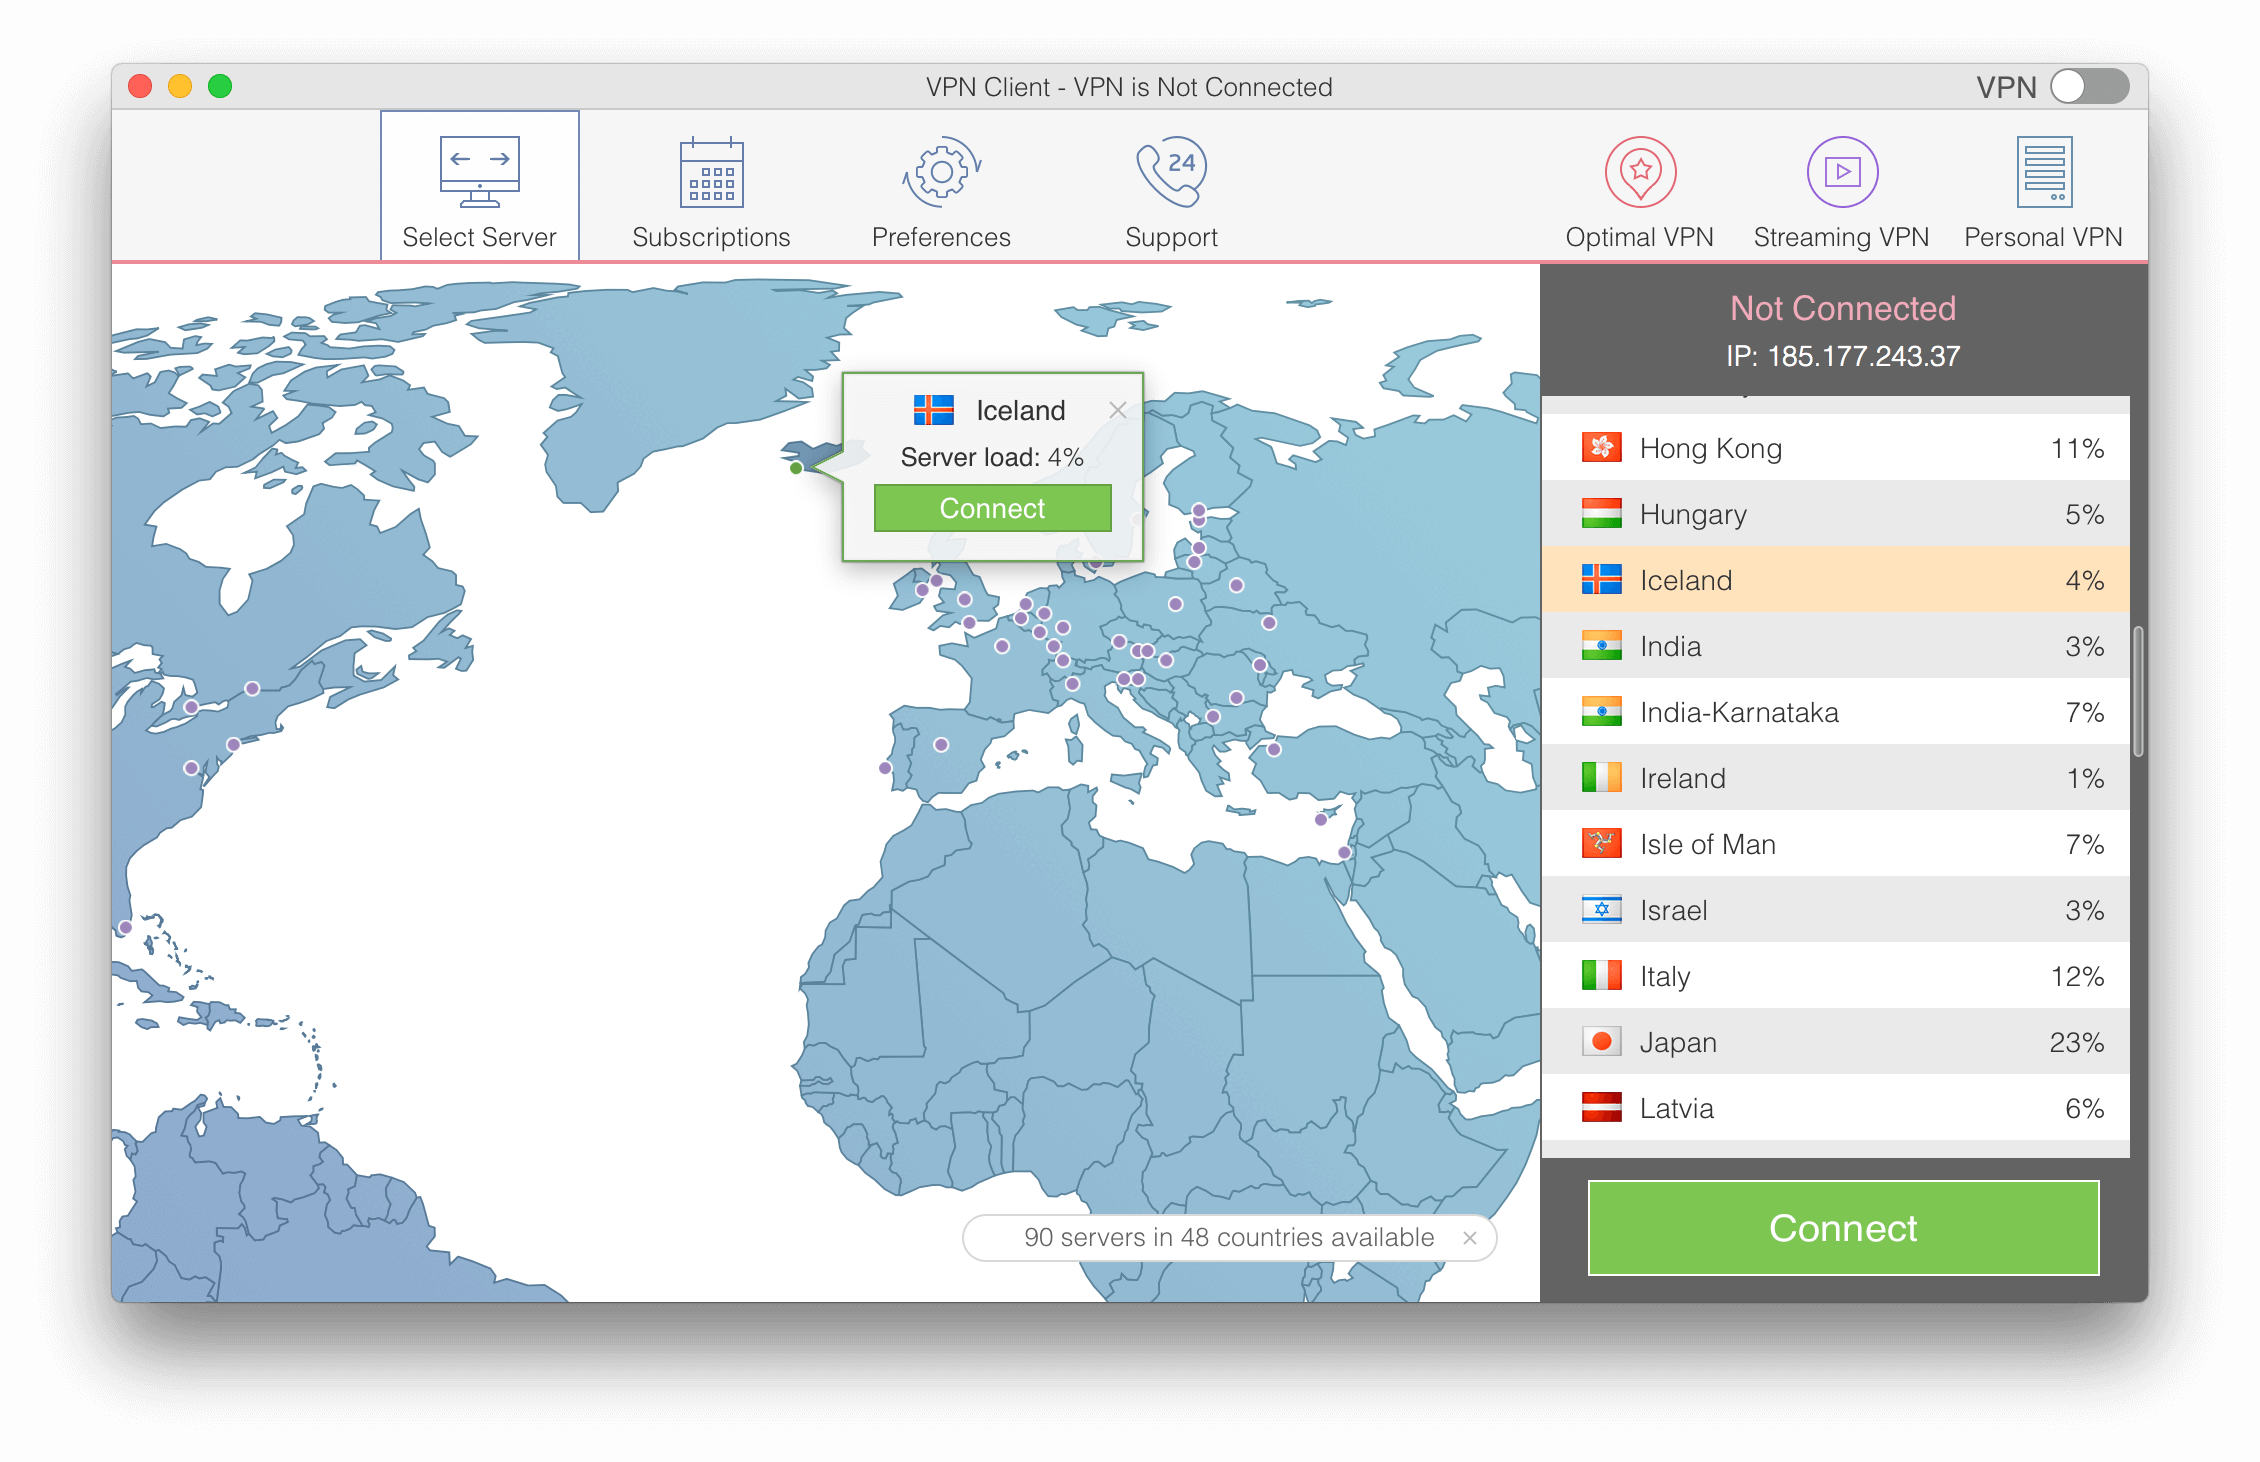
Launch VPN Client on your Mac. The app will show you the optimal VPN server for your location. Click the green button to connect to Optimal VPN server.

*You can also choose another needed VPN server from the list, and click Connect.
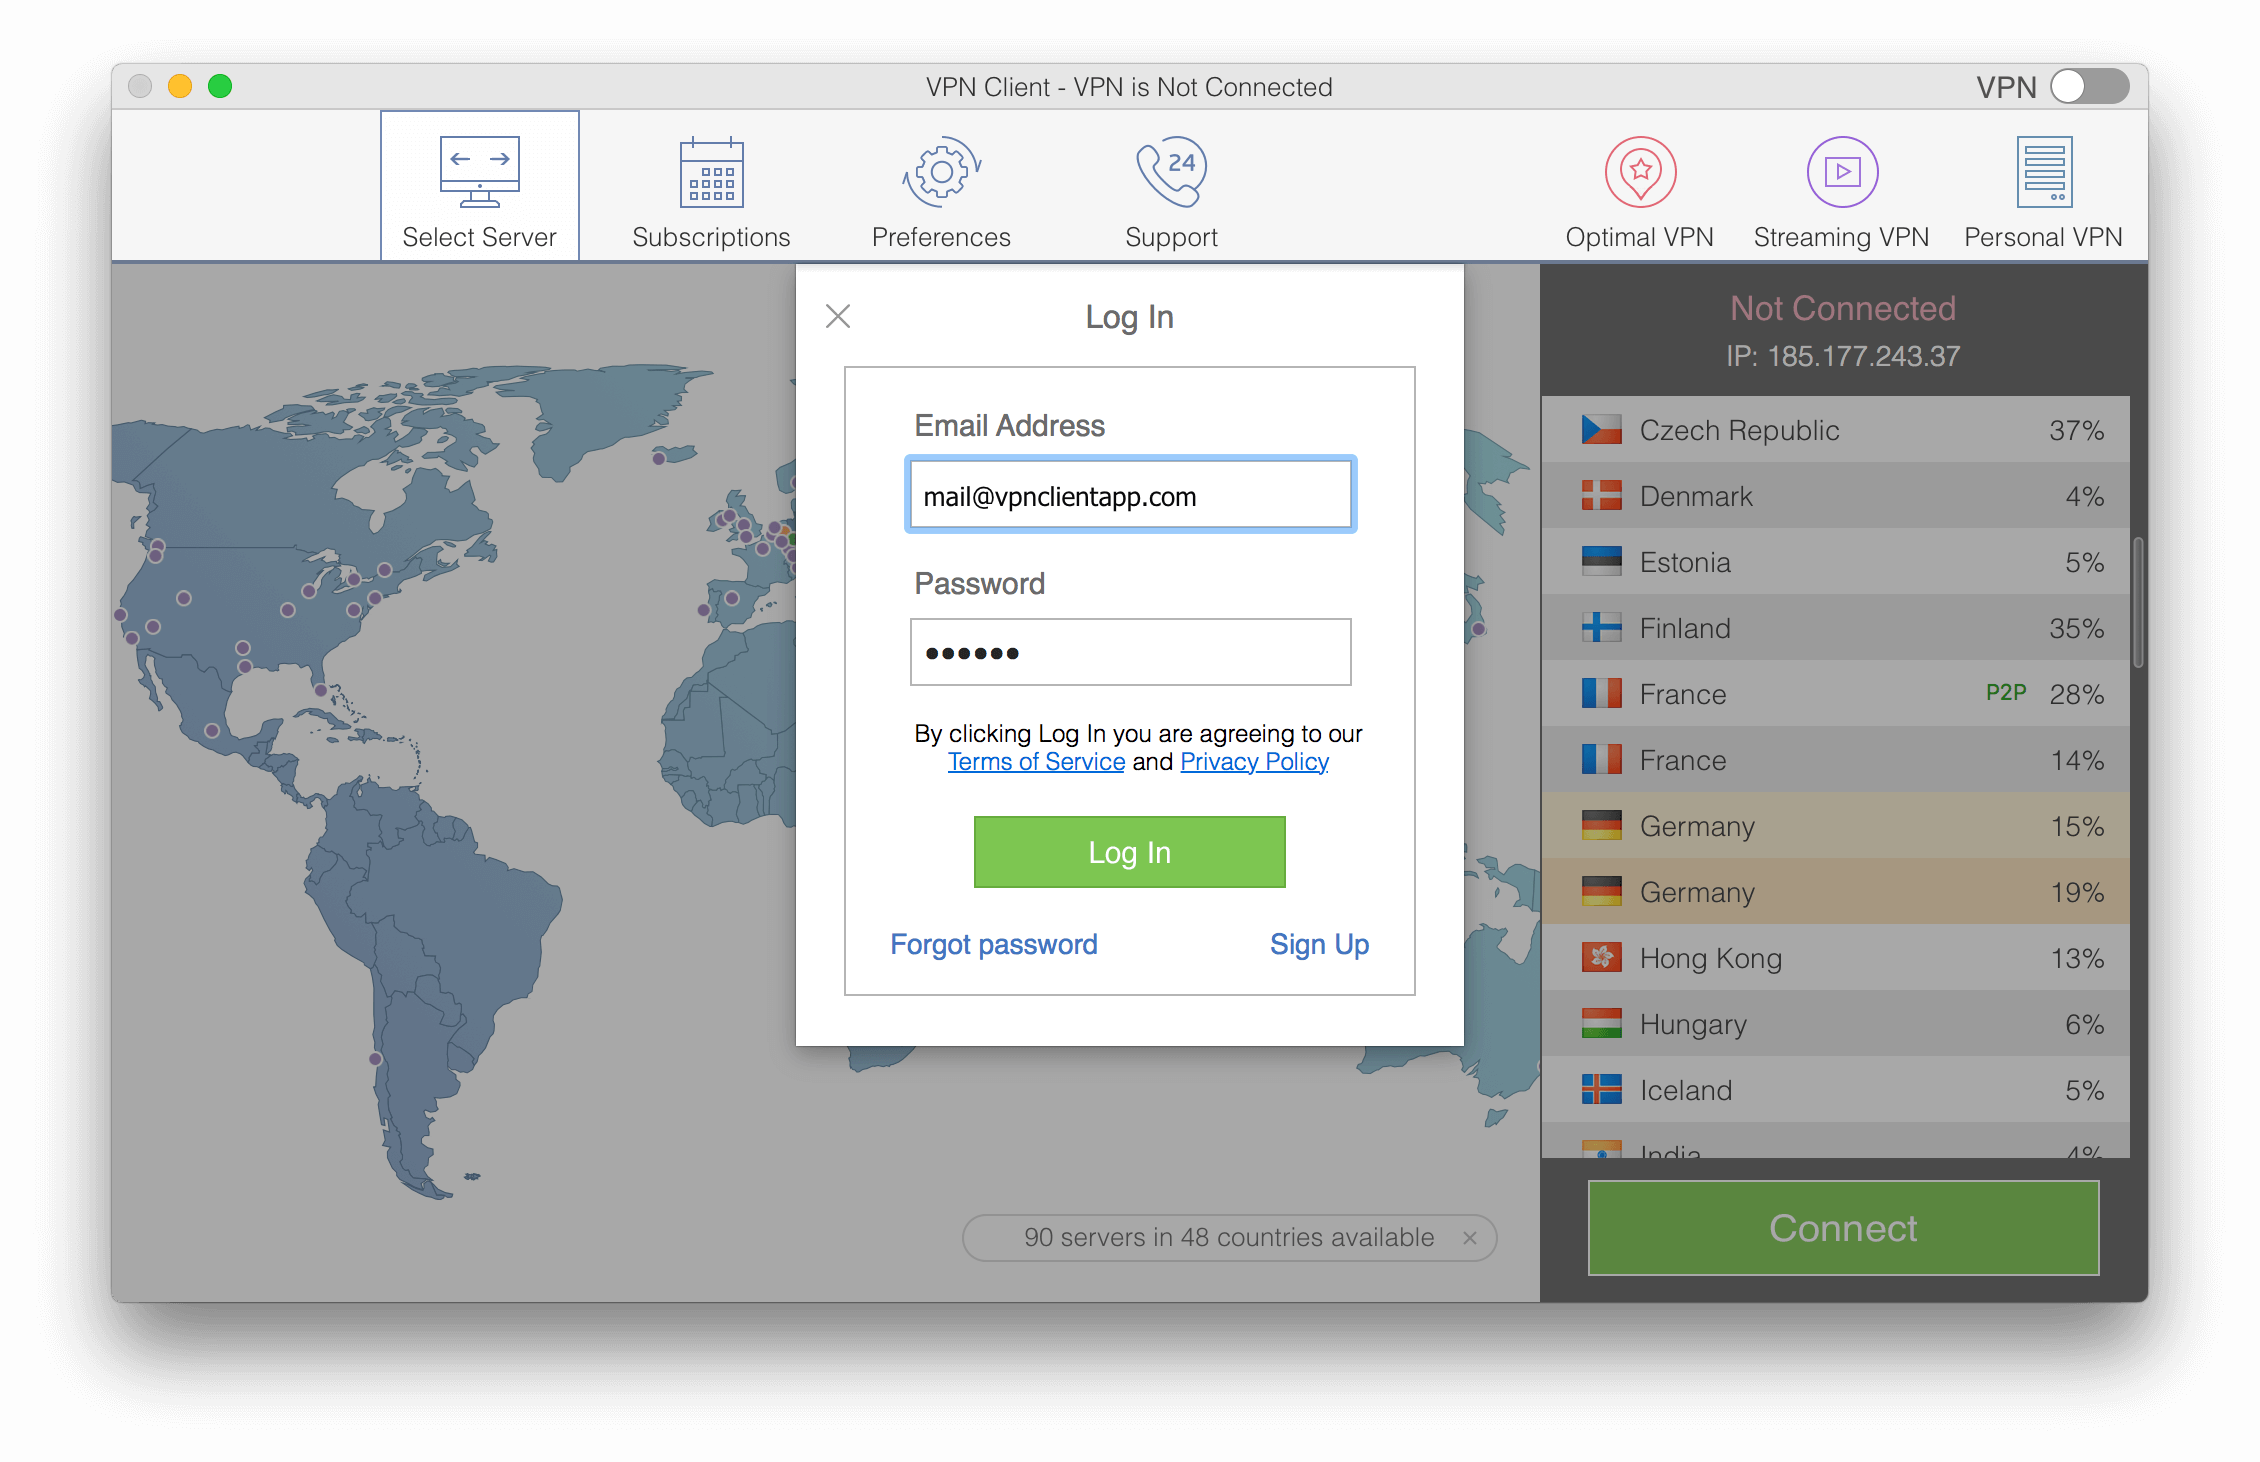
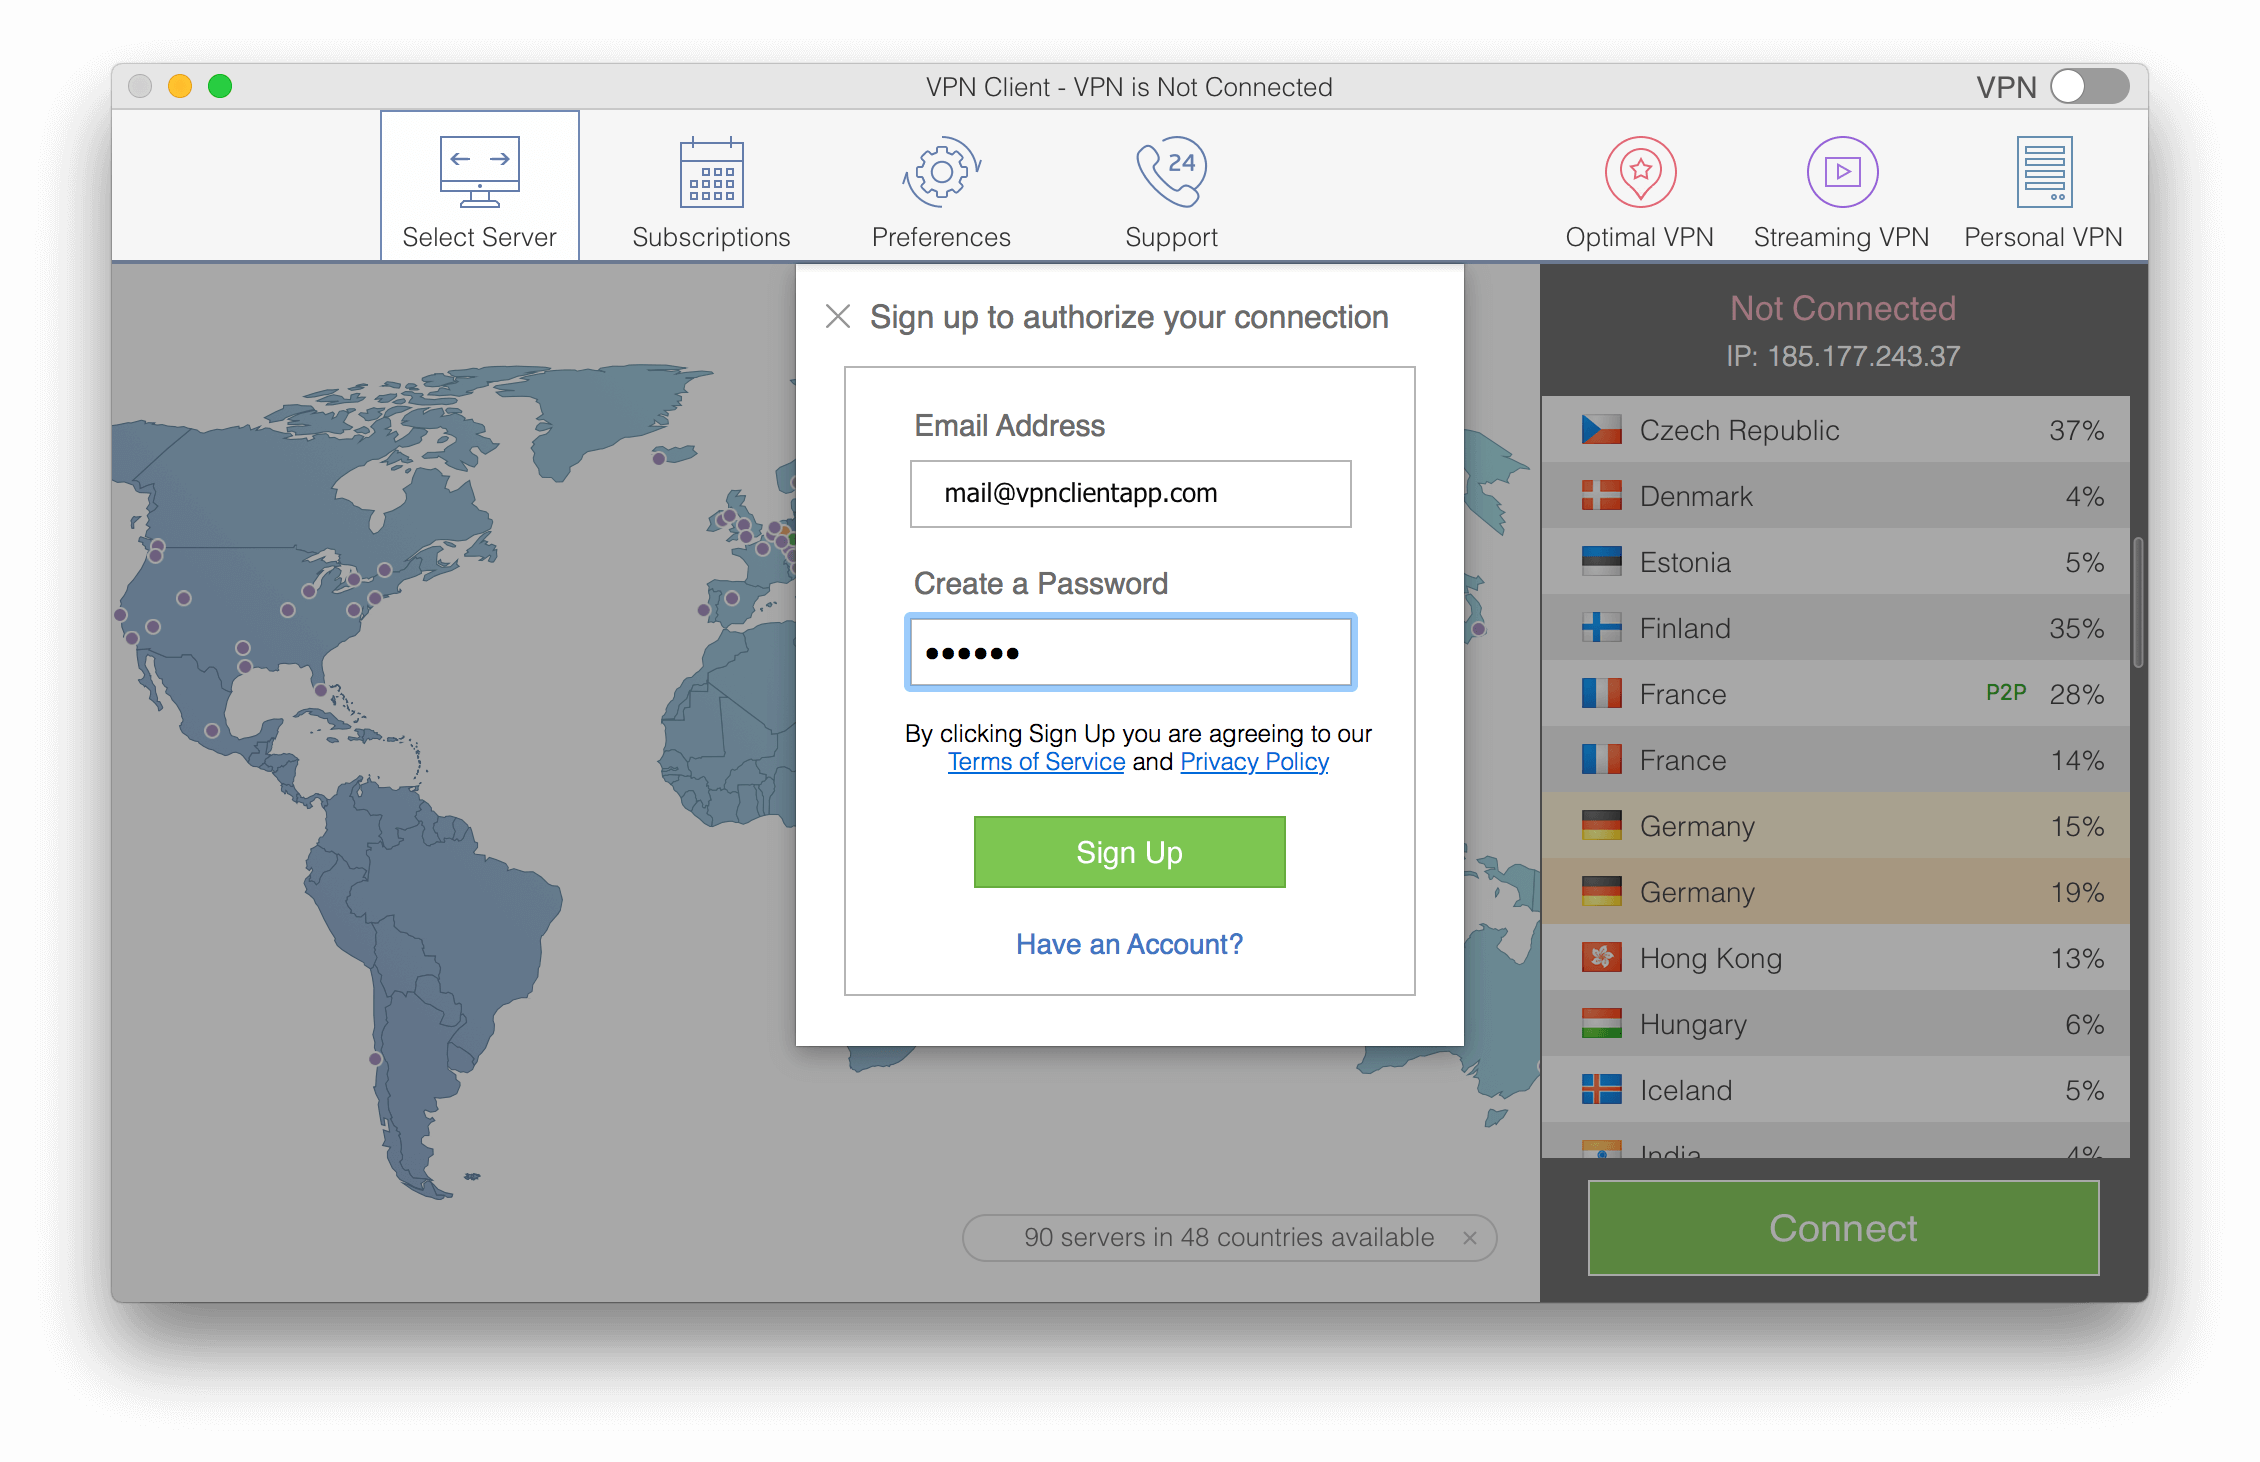
Step 3
You will see the Login pop-up window. If you already have an account, enter your email and password; then click Login. If you are using VPN Client for the first time, click Sign Up to authorize your connection. Type your email address and password and sign into your account.
Step 4
If you are using VPN Client for the first time, you will be asked to install the VPN configurations profile.
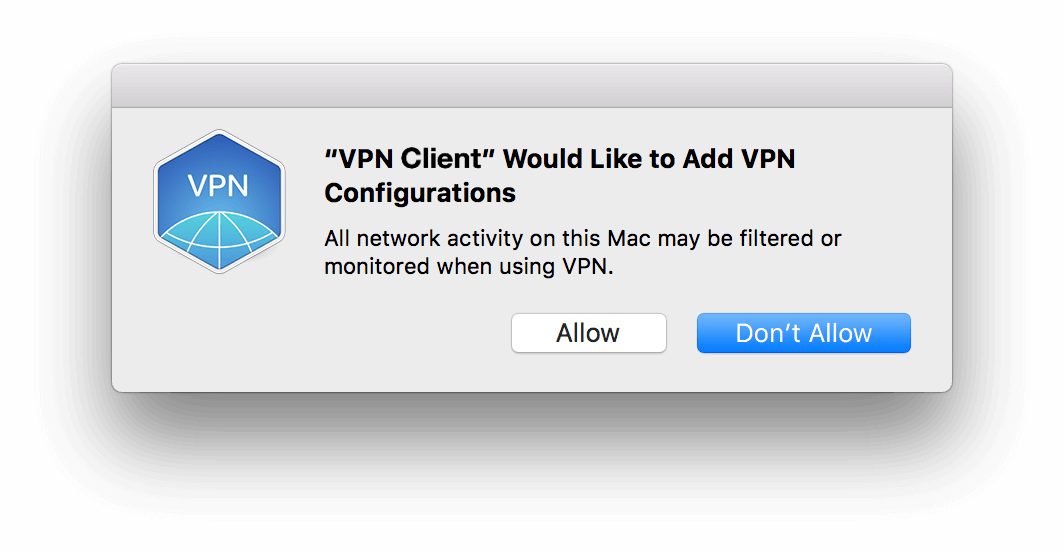
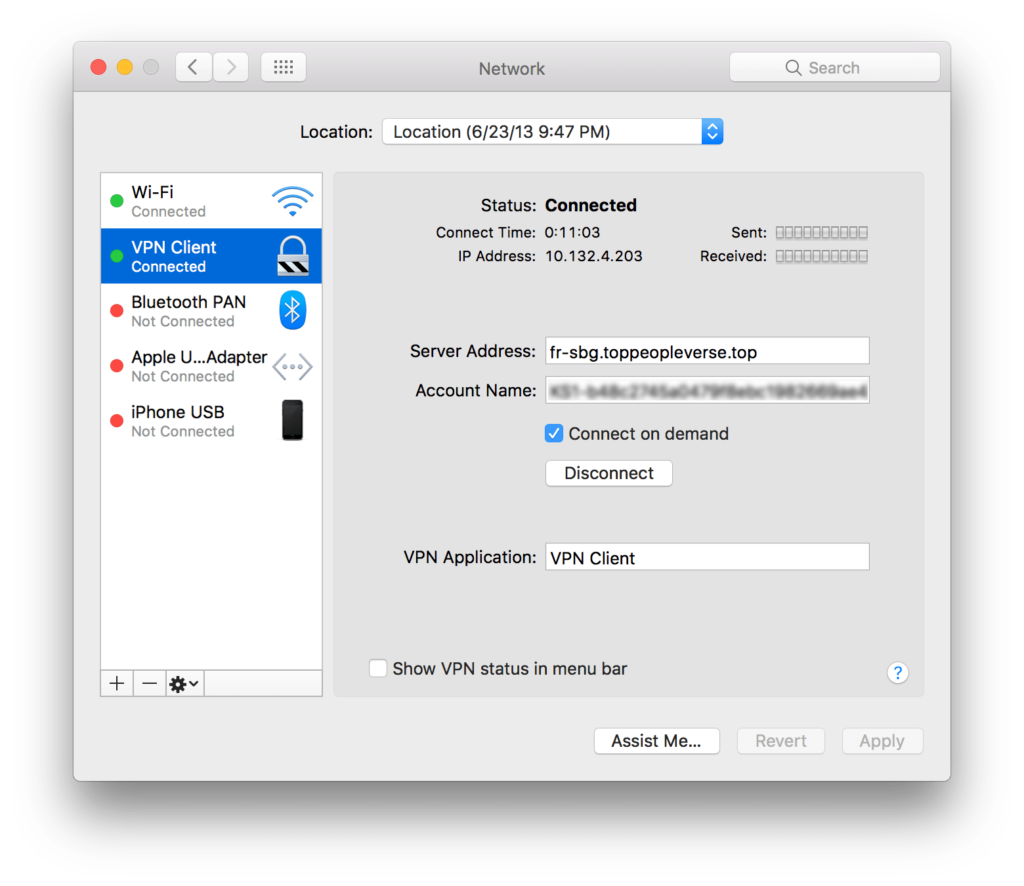
Confirm it by clicking the Allow button. The VPN Client profile will be added to the Network list.
Next time you launch VPN Client or login to your account, you can connect to the virtual tunnel with one click.
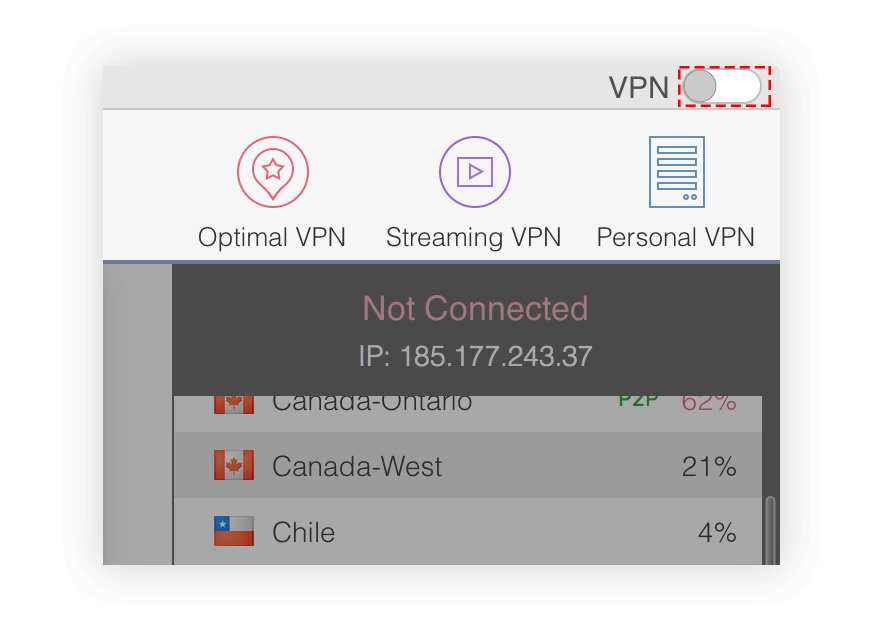
You can quickly turn on VPN service in one of the provided ways convenient for you:
-
- Click the green Connect button
-
- Use a switch button from the top-right corner of the window
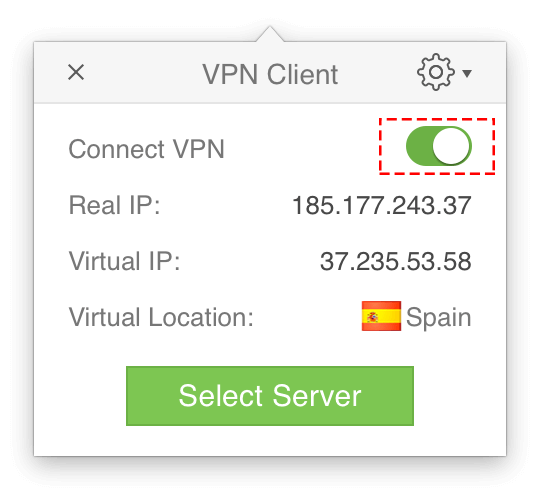
- Use a switch button in a quick-access window from the Menu Bar.
 When you connect to VPN Client, you can still use the optimal (fastest) VPN server or select any other VPN server from available locations.
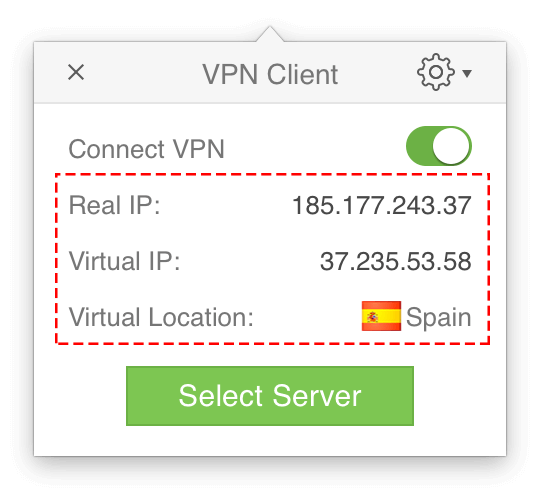
Note, whenever you log in, you can use the quick User menu in the Menu Bar. Here you can connect or disconnect VPN and view the brief information about your VPN connection:
- Real IP address
- Virtual IP address
- Virtual Location